Watch our video "KeyCreator Pro 2022 Selection Enhancements"
KeyCreator Pro 2022 provides new selection options for quickly selecting profiles and faces/edges in the foreground of solids/surfaces. This video demonstrates how these new features can be used with some simple examples.
Video Transcript:
Selection Toolbar
Let's take a look at the new selection functions. The new selection toolbar is not displayed by default to access it. You’re going to go ahead and select the selection toolbar. And you'll see that the four items in the middle are not turned on by default. This is so we don't interfere with any settings you may already have set.
Profile and Chain Filters
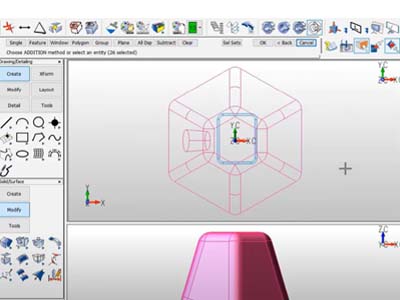
The intent of these icons in this toolbar is to quickly access the same settings that you find under system settings - but to get at them much faster. Again, the idea is that they were going to work very much like the position snap. We can quickly go ahead and toggle how you want the selection behavior to work. Let's go ahead and start with the profile. This is the new profile selection, it's intended to be used for pre-selection, so it's on, and now you'll notice as I hover my cursor over different faces or edges, it automatically finds closed planer profiles. This will also work on wireframe. The idea here is that I can quickly select with one selection an entire closed profile for a function like extrude. And quickly do an extrude. Again, any of the chain options you currently have set are not affected with these options. Let's turn that off, and let's go take a look at the chain filter, the chain filter is used to select open profiles. The way this works is where you hover, the cursor determines the first entity to be in that chain and also the direction noticed what end it’s near. I come over to this side. I'm selecting that entity as the beginning of my chain in the direction that it's going to go. Move it to this side in the selection process goes the other way. This will also work on closed profiles just because they meet the requirements of an open profile as well.
Foreground Selection
Another option that we have is called the foreground selection. Let's take a look at a file that's better suited to illustrate this. So with the foreground not being turned on when I help move my cursor over, say this face here, I can use the spacebar to toggle through everything that's underneath the cursor. That's including the faces behind that face in the solid itself. This also applies to any edges. Let's go ahead now and turn that off. Or I should say turn it on. So now, when I go back to that option, I hit the spacebar and you'll notice that I'm only selecting the face that's visible in this view in the solid. They come down to this view. Again, only picking the face that's available, and you'll notice also that I can no longer select the edges that are behind. This will also work in wireframe. The other benefit of having the foreground option is that we've improved it, so it works with Windows selection. So, if I window select - let's go ahead and do a function here of stitch - we're going to unhook some faces. And I'm going to window those, select those faces. Notice that only the faces that are visible in that particular view in the front of that particular view are selected. This allows you to quickly do a core and cavity or at least get you started in the selection of core and cavity geometry.

